Impresszum Help Sales ÁSZF Panaszkezelés DSA

Tunisian Crochet Lessons: Basic Stitches to Try

Tunisian crochet, also known as Afghan crochet is a beautiful mix of knitting and crocheting. The craft works with an interchangeable Tunisian crochet hook but keeps the loop of stitches on the working hook just like knitting. Alike both crafts of knitting and crochet, this unique subset of crochet works on basic stitches. The stitch names are also the same as knitting and crocheting, Tunisian Knit Stitch, Tunisian Purl Stitch, Tunisian Double crochet, etc. Along with similarities, there are differences, too. As compared to traditional crochet, the fabric is highly textured. You get reversible fabric that has a similar tendency to knitting stockinette’s curling nature. Also, compared to knit and crocheted fabrics, Tunisian is much denser and warmer, ideal for winter projects. So, to learn the strings of the craft you start with mastering the basics.

How to Get Started with Tunisian Crochet

The right crochet hook is the first step to get started with Tunisian crochet. Refer to our beginner's guide to selecting a Tunisian crochet hook. You will need a hook that makes loops with a length similar to a knitting needle as you put the loops of stitches on the hook. It is essential that the crochet hook be light in your hands, smooth to work with and prevent snags. Lantern Moon’s ebony wood interchangeable Tunisian crochet hook is all that and more. The liquid-silk finish makes stitching a dream come true. Plus, you get standard sizes and cord lengths according to your projects. If you are keen on exploring the craft, the Bequest Set of interchangeable Tunisian crochet hooks has multiple sizes and accessories packed in a handy case of khadi-silk.

For yarn, choose according to the hook size. For practice, choose from your yarn stash. For projects if you are following a pattern, you will have all relevant information.

Fundamental Tunisian Crochet Stitches

Let's explore the three fundamental Tunisian crochet stitches that form the foundation for countless projects. With time, expand your repertoire but for beginner projects, the knowledge of these is sufficient. It is important to understand that Tunisian crochet stitches are worked over two rows. First, you have a foundation- the forward pass, where you make loops on your hook. Second, in the return pass you work the loops on your hook and create the fabric. But, like traditional crochet, you start with a chain with additional stitches for the turning chain. All stitches follow the 2-row step.

Tunisian Simple Stitch (TSS)

The foundation of Tunisian crochet, Tunisian Simple Stitch is easy to work even for beginners. The versatile stitch pattern works for many projects, such as a dishcloth, coaster, blankets, etc.

Steps to work TSS

Make a chain of 20+1 stitches.

Work the Forward Pass

1st Step- Insert your Tunisian crochet hook through the vertical bar stitch of the first loop.

2nd Step -Yarn over and pull up a loop, keeping the loop on your hook. Continue this process for each loop on your hook, working from right to left.

Work the Return Pass

3rd Step - Yarn over and pull through one loop on your hook.

4th Step- Yarn over and pull through two loops at a time until you reach the end of the row.

Tunisian Knit Stitch (TKS)

The Tunisian Knit Stitch (Tks) is a beginner friendly stitch pattern. Resembling its knitting counterpart, stockinette stitch the fabric made also shares its beautiful curl. The tenddnecy to curl works beautifully for some projects while it can be balanced with blocking or an additional row of TSS.

Steps to work TKS

Make a chain of 20+1 stitches for practice or as mentioned in a pattern.

Work the Forward Pass

1st Step - Insert the hook between the front vertical bar to the back.

2nd Step - Yarn over, pull up a loop, leave the loop on the hook, and continue across the row.

Work the Return Pass

The return pass for Tks is the same as for the Tunisian Simple Stitch (TSS).

3rd Step - Yarn over and pull through one loop on your hook.

4th Step- Yarn over and pull through two loops at a time until you reach the end of the row.

Tunisian Purl Stitch (TPS)

A little challenging, the Tunisian Purl Stitch also takes inspiration from knitting. Resembling the knitted Garter stitch, this Tunisian crochet stitch works for a wide range of projects. It is beautifully textured and reversible, perfect for many designs.

Steps to work TKS

Make a chain of 20+1 stitches for practice or as mentioned in a pattern.

Work the Forward Pass

1st Step – Make sure that the yarn should be placed in front of your work. Skip the first vertical bar and insert the Tunisian hook right-to-left under the next vertical bar.

2nd Step- Bring the yarn behind your piece of work. Yarn over, and pull up a loop in each stitch.

Work the Return Pass

3rd Step - Yarn over and pull through two loops.

4th Step - Repeat the 3rd step till the end of the row.

With these three basic stitch patterns get ready to Tunisian crochet.

Tovább

Tested Tips to Knit with Double Pointed Needles like a Pro

Are you overwhelmed while working with double-pointed needles? There’s no reason to stay away from DPNs. They are handy whenever you need to knit small circumferences. Think of socks, baby hats, necklines, and sleeves. DPNs have been in use for centuries and, to date, are preferred to knit things in the round. The five needles and ten points may seem challenging to handle. However, working with DPNs is believed to be a rite of passage for knitters to become masters truly. Whether you’re working for the first or 100th time, there are chances of mistakes, but the key is to correct them and have fun with your craft. If you are a beginner uneasy knitting with double-pointed needles, we’ll walk you through useful tips to become a pro in this blog.

Take a look at these tips

1. Cast on stitches on one needle tip and then divide them evenly

When you knit with double-pointed needles, you use three or four needles to make a circumference while knitting with the extra one. Ensure to cast stitches on one needle tip and divide them evenly, which will help you maintain the tension. Moving the slip knot also helps to move the stitches and maintain the tension. It is also helpful to move the stitches on the needles after a few rounds to balance the tension throughout the project.

Say, for example, you have to cast 30 stitches. Use any of your preferred methods to make stitches. Count the slip knot as the first cast-on stitch unless the pattern mentions otherwise.  If your pattern asks you to use three DPNs, slip 10 stitches on each needle. But if you need to work with four needles, then slip 7, 8, 7, and 8. Ensure that if you cannot divide the stitches evenly, you try to divide them equally as possible.

2. Work with 3 Needles 

While working with double-pointed needles, fewer needles in the round mean less chance of mistakes. If your pattern mentions 4 DPNs for the circumference, yet the stitch count is less, you can work with three needles but make sure to have the right length. Say, for example, you have 40 stitches and have been instructed to work with four needles, stick to 3, and you can still work the round smoothly. With options of 6-inch and 8-inch lengths, choose the right set of DPNs for your project accordingly. While 6-inch needles are ideal for socks, a sweater will require 8-inch lengths to accommodate the circumference.

3. Neatly join the round

Joining the round neatly is essential whether you work with DPNs or circulars. It is more significant to use double points as you may have to deal with ladders and gaps. There are many ways to join the stitches. An invisible join is a knitters’ favorite. To make an invisible join, you start by casting an extra stitch, and instead of knitting the stitch, slip it over. When working with DPNs, explore the various methods to join the round and understand what works for you. With time and practice, you’ll master the techniques.

4. Avoid laddering by maintaining tension

Ladders are a common problem that knitters face while working with double points.  Where two knitting needles join, stitches stretch or far apart, looking like the aftermath of a dropped stitch. Now a trick to solve this problem is to maintain constant tension but also to tighten up the second stitch on every DPN or the last stitch of the round.

5. Add Stitch Markers and Point Protectors

Knitting accessories are essential when you are working with double-pointed needles. Stitch markers and point protectors both are useful. Stitch markers are used for the purpose of marking and reference in a project. To identify the start of the round when working with DPNs, you’ll need stitch markers even though the yarn tail is there to remind. But instead of placing one at the last stitch of the round where it may slide off the needle, place it on the second last stitch. Similarly, needle protectors are useful, especially when you keep the project down for the day. The needle tips are covered, making it difficult for stitches to slide off by accident.

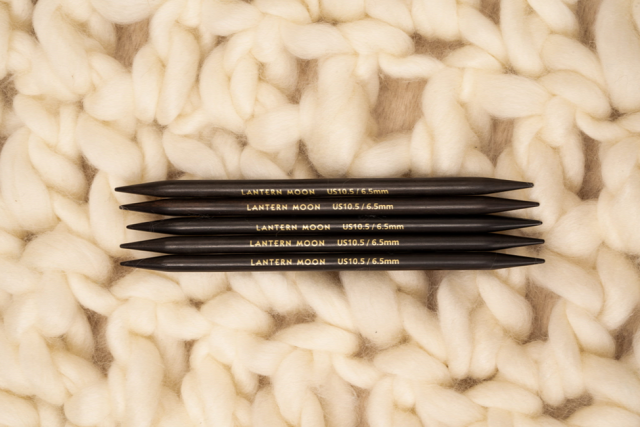
With these handy tricks, you will soon enjoy knitting with DPNs and reach for them for most of your circular projects. To enjoy working with double-pointed needles, the Lantern Moon collection offers smooth ebony wood knitting needles. Wooden knitting needles are preferred over others as the material ensures a balanced flow of yarn while stitch making. The needles' luxury silk finish and precision tips make for an enjoyable knitting session every time you pick them up.


Tovább

How To Knit Two Together (K2tog) For Beginners

We know the excitement you feel as you begin knitting. You pick up your knitting needles and start knitting whenever you have time. Knit and purl can be called the backbone of knitting as these are the basic knitting stitch types. When you want to advance in your stitches, you carry on with variations of knit and purl. One of the variations is called "Knit two together." In short, you can say k2tog. That is today's topic to explore. Shall we start?

What is K2tog?

As we mentioned above, it's a variation of knit. If you can do the knit stitch, you will so likely be able to k2tog. To achieve this stitch, we have to do exactly the same as its name says.

How to do it?

  1. Pick up your premium knitting needles (for ultimate finish), and start with the yarn behind your work.
  2. Now insert your right knitting needle through the first two stitches on the left needle from left to right.
  3. Then, wrap the yarn around the tip of the right needle.
  4. Pull the yarn through both of the stitches simultaneously.
  5. Now, drop down both stitches from your left needle.

K2tog is a right-side leaning decrease technique. Wasn't that easy as pie? You can also try purl two together (P2tog). Instead of the knit stitch, you just purl in the same way as we did in k2tog.

When to Apply K2tog?

The k2tog stitch can be used to reduce the number of stitches in a row. For instance, to decrease the number of stitches at the top of a hat, the tip of a mitten, and the toe of a sock, use decreases like k2tog.

Furthermore, k2tog is most frequently used on the left side of clothing because it is a right-leaning decrease. This decrease gives the impression of slanting inward toward the work's center when executed in this manner.

Now that you have acquired a new stitch technique let's put it to some use by making a simple project: A Bandana.

Bandana Pattern

Knitting Accessories:

Pattern:

Cast On 3 Stitches

Row 1: Knit All Stitches (3 stitches total)

Row 2: Slip 1, Cast On 1, Purl 1, Cast On 1, Purl 1 (5 stitches total)

Row 3: Slip 1, Knit Remaining Stitches (5 stitches total)

Row 4: Slip 1, Purl 1, Cast On 1, Purl 1, Cast On 1, Purl 2 (7 stitches total)

Row 5: Slip 1, Knit Remaining Stitches (7 stitches total)

Row 6: Slip 1, Purl 2, Cast On 1, Purl 1, Cast On 1, Purl 3 (9 stitches total)

Row 7: Slip 1, Knit Remaining Stitches (9 stitches total)

Row 8: Slip 1, Purl 3, Yarn Over, Purl 1, Yarn Over, Purl 4 (11 stitches total)

Row 9: Slip 1, Knit 3, Knit 1, Purl 1, Knit 1, Knit 4 (11 stitches total)

Row 10: Slip 1, Purl 3, Yarn Over, Knit 1, Purl 1, Knit 1, Yarn Over, Purl 4 (13 stitches total)

Row 11: Slip 1, Knit 3, Purl 1, Knit 1 until 5 stitches remain, Purl 1, Knit 4

Row 12: Slip 1, Purl 3, Yarn Over, Purl 1, Knit 1 until 5 stitches remain, Purl 1, Yarn Over, Purl 4

Row 13: Slip 1, Knit 3, Knit 1, Purl 1 until 5 stitches remain, Knit 1, Knit 4

Row 14: Slip 1, Purl 3, Yarn Over, Knit 1, Purl 1 until 5 stitches remain, Knit 1, Yarn Over, Purl 4

(Repeat Rows 11-14 until the top of your triangle is about 18 inches across. If you are using fine/fingering weight yarn, you should have about 95 stitches on your needles. End after completing Row 13.)

Row 15: Slip 1, Purl 3, Yarn Over, Purl 2 Together until 5 stitches remain, Yarn Over, Purl 1, Yarn Over, Purl 2 Together twice, Cast On 35

Row 16: Knit to last 4 stitches, Knit 2 Together twice, Cast On 35

Row 17: Purl all stitches

Row 18: Knit all stitches

Row 19: Purl all stitches

Bind off.

Enjoy your new creation and show it off to your family or friends. If you want to learn more exciting increasing and decreasing techniques, visit the website.

Tovább

How to cast on with a crochet hook

In knitting, cast-on is the method to lay the foundation of the project. Cast-on techniques work with knitting needles and there are many methods, depending on the knitting pattern, project and even the knitter. A less common method but with great effects is to cast on stitches with a crochet hook. This is useful for various purposes and if you have been a crocheter you will find the cast-on with crochet technique come to you naturally. The crochet cast-on makes a neat edge for knitting projects. The stitches mirror most regular bind-off edges. Also, it can be useful when adding stitches in the middle of a project such as a provisional cast—on.

Though you might be comfortable with the cast-on method, learning and exploring new ways helps you expand your knowledge for knitting projects in the future.

To get started, gather your supplies.

  • Yarn - For the practice of the crochet cast-on method use any yarn from your stash. But if you want to go ahead with a project, then use the yarn you’ll be working with the same yarn for the project. If you are following a knitting pattern, then you will have information on the yarn fiber and weight.

  • Knitting Needles – Work with any knitting needles. If you are planning to work on a swatch knit back and forth then either use a needle from the pair of single-pointed If you are working with circular needles, get hold of one needle tip while you can cast stitches on the tip as well as the cord connecting it. For knitting in the round, if you are working with circulars, cast stitches on the needle tip and transfer them to the connecting cord. If you are working with double-pointed needles, you still need to cast stitches on one tip and then transfer them to the two or three double points used for the circumference. Make sure that the needle size matches the yarn weight.

  • Crochet Hook – Similar to the knitting needles, the crochet hook size should match the yarn weight. Also, the crochet hook size must be matching the needle size. Though both tools follow different standard sizes, you can find a common factor in the diameter of the hook or needle. Also, you can choose any single-ended crochet hooks. And, if you own the interchangeable Tunisian crochet hook, you can still go ahead but just don’t attach the cord. If you are a tight knitter or a beginner crocheter, it is better to use a crochet hook one or two sizes larger than the knitting needle. This way the cast-on stitches will have a firm edge that is not too tight.

To help you with how to cast on stitches with a crochet hook, here is a quick tutorial.

Like most cast-on methods in knitting, hold the knitting needle in your left hand. Keep the crochet hook in your right hand. Hold the working yarn in your right hand and create a slip knot loop around the crochet hook.

To cast stitches, bring the yarn over the crochet hook and behind the needle. Pull the yarn through the loop on the hook. Now you will have 1 stitch cast on your knitting needle. You will basically work a chain stitch on the knitting needle.

Repeat the chains as many times as the required cast-on stitches.

Once you have neat cast-on stitches sitting on your knitting needle keep your crochet hook aside.

Turn your project and begin knitting.

Another way to work the cast on with a crochet hook is, to make a chain in the air and then insert the knitting needle tip through the loops.

Crochet Cast on for Provisional Cast-On Stitches

The crochet cast-on is a quick and convenient provisional cast-on method. Provisional means for the time being. It is a sort of temporary cast that can be removed later to work on that section. This is for some designs in a sweater collar or even the sleeves. You can work this method using waste yarn.

Besides the above cast-on techniques, it is handy for knitters to work with crochet hooks. This may soon become your favorite method to cast on stitches. You can also fix many knitting mistakes without unraveling the stitches, pick a dropped stitch easily, bind it off neatly and add a fringe or edge to your projects.

With the Lantern Moon Collection, explore premium ebony wood knitting needles and crochet hooks. Handcrafted by skilled artisans, the tools and accessories are worth their value. Explore the range of knitting needles or interchangeable circular knitting needle sets that serve a wide variety of projects. Similarly, the crochet hook sets work for multiple crochet projects.

Tovább

Learn to knit Slip 2, Knit 2, Pass Slipped Stitches Over (S2KP)

Slip 2, Knit 2, Pass Slipped Stitches Over (S2KP) is a decrease technique used in knitting. It creates a centered double decrease, which means it decreases two stitches while maintaining the stitch count and keeps the decrease centered on your work. In knitting, when you working on projects that require shaping, you will come across a wide range of instructions for the way you work with your knitting needles to decrease the count of stitches from the previous row or round. There are many ways to decrease stitches, the most common one is to knit or purl together. Knitting decreases are used for projects such as hats, socks, and sweaters for proper fit and other projects. 

Whether you are working back and forth on a pair of single-pointed or circular needles, both basic knitting techniques work for shaping. These methods also work when working with double-pointed needles or circulars to knit as usual or even the magic loop. This can be little confusing if you have never done it before. In this blog, let’s walk you through both the basic knitting decrease techniques.

Here's how you work the Slip 2, Knit 2, Pass Slipped Stitches Over (S2KP) decrease:

Slip 2 stitches together knitwise: Insert your right needle into the next two stitches on the left needle as if you were going to knit them together, but instead of knitting them, simply slip them together onto the right needle.

Knit 2 stitches together: Insert your right needle into the next two stitches on the left needle and knit them together as a regular knit stitch.

Pass the slipped stitches over: Using the left needle, lift the two slipped stitches on the right needle over the knit stitch you just made. This is similar to binding off, where you pass one stitch over another.

After completing these steps, you will have decreased two stitches and formed a centered double decrease.

It's worth noting that the S2KP decrease is often used in lace patterns to create a decorative decrease that leans to the right. It can be found in various knitting patterns and is a useful technique to have in your knitting repertoire.

Besides this, there are several common techniques used in knitting to reduce the number of stitches and shape the fabric. Here are a few popular knitting decrease techniques:

Knit Two Together (K2tog): This is one of the most basic and commonly used decrease techniques. To work a K2tog decrease, simply insert the right needle into the next two stitches on the left needle as if to knit, then knit them together as a single stitch. This decreases one stitch.

Slip, Slip, Knit (SSK): The SSK decrease creates a left-leaning decrease. To work an SSK, follow these steps: Slip the next stitch as if to knit onto the right needle, slip the following stitch as if to knit onto the right needle, insert the left needle into the front loops of these two slipped stitches, and knit them together through the back loops. This decreases one stitch.

Purl Two Together (P2tog): This decrease technique is similar to the K2tog but is worked on the purl side of the fabric. Insert the right needle into the next two stitches on the left needle as if to purl, then purl them together as a single stitch. This decreases one stitch.

Slip, Slip, Purl (SSP): The SSP decrease creates a left-leaning decrease on the purl side. To work an SSP, follow these steps: Slip the next stitch as if to knit onto the right needle, slip the following stitch as if to knit onto the right needle, insert the left needle into the front loops of these two slipped stitches, and purl them together. This decreases one stitch.

Central Double Decrease (CDD): The CDD decrease creates a centered double decrease that slants to the right. To work a CDD, follow these steps: Slip two stitches together as if to knit, knit the next stitch, then pass the two slipped stitches over the knit stitch. This decreases two stitches.

Slip Slip Knit Pass (SSKP): The SSKP decrease creates a left-leaning double decrease. To work an SSKP, follow these steps: Slip the next two stitches individually as if to knit onto the right needle, insert the left needle into the front loops of these two slipped stitches, knit them together through the back loops, then pass the resulting stitch over the knit stitch. This decreases two stitches.

These decrease techniques can be used in various knitting projects, such as shaping sleeves, necklines, or creating decorative stitch patterns. They provide different slanting effects and help achieve the desired shaping and structure in your knitting.

Choosing the right decrease method depends of your knitting project or the designer who has written the pattern. For advanced knitters, the method is chosen by the level of their knitting skills and the stitch pattern.

For all your knitting projects, explore the Lantern Moon Collection. The range of handcrafted knitting needles, crochet hooks and accessories are made from premium ebony wood with a liquid-silk finish that has an effortless glide for all types of yarn and projects.

Source: https://medium.com/@lanternmoonhandcrafted/learn-to-knit-slip-2-knit-2-pass-slipped-stitches-over-s2kp-954afaca0665

Tovább
«
123

lanternmoon

blogavatar

Phasellus lacinia porta ante, a mollis risus et. ac varius odio. Nunc at est massa. Integer nis gravida libero dui, eget cursus erat iaculis ut. Proin a nisi bibendum, bibendum purus id, ultrices nisi.

Utolsó kommentek