Szolgáltató adatai Help Sales ÁSZF Panaszkezelés DSA

Crochet Heart Cushions for Valentine

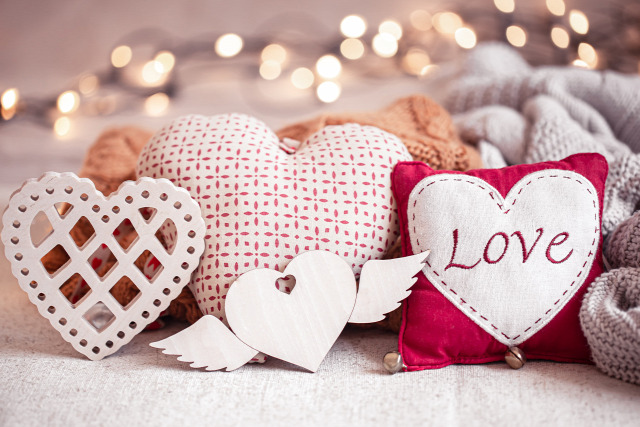
Are you struggling to find the perfect gift for your loved ones? As Valentine's Day is around the corner, it is the ideal time to show your love with unique gift ideas such as heart cushions. These adorable pillows are the perfect complement to your Valentine-themed décor because they are comfortable and beautiful. We'll walk you through the steps of making lovely crochet heart cushions in this blog with your crochet hook.

What Materials Do You Require?

Before you start crocheting, gather all your materials to make it perfect.

  1. Crochet Hooks: You can work with any single-ended crochet hook, but the ideal size is 5mm (H-8). However, the exact size depends on the yarn weight. Refer to our blog, for choosing the right crochet size for your project.

  1. Yarn: Worsted-weight or DK-weight yarn works well for heart cushions. Opt for soft, durable yarn in Valentine-inspired colors like red, pink, white, or multicolor blend.

3: Crochet Accessories: Along with a crochet hook, you must keep supporting tools for your project, such as stitch markers, a finishing needle, and a pair of scissors.

  1. Stuffing: Use polyester fiberfill or cushion stuffing to give your hearts a soft, plush feel.

Crochet Abbreviation

US Terms

UK Terms

Single Crochet (SC)

Double Crochet (DC)

Double Crochet (DC)

Treble Crochet (TR)

Half Double Crochet (HDC)

Half Treble Crochet (HTC)

Slip Stitch (Sl St)

Slip Stitch (SS)

Read in detail on US vs UK crochet terminology with our blog.

Step-by-Step Guide to Crochet Heart Cushion

  1. Start with a Simple Crochet Pattern

Choose the simplest heart design, to make a cushion. Here is an easy step-by-step instructions:

Step 1- Create a magic ring and use a slip stitch to secure it. This is the foundation of your heart.

Step 2- Round 1: To create the rounded top of the heart, crochet a mix of SC, HTC, and DC, stitches into the magic ring.

Step 3- Developing the Heart: Increase the stitches at the top curves of the heart gradually in rounds or rows, and then reduce them to make the tip at the bottom.

Step 4- Create two similar heart forms, one for the front and another for the back, and repeat the same steps for the back piece.

  1. Experiment with Tunisian Crochet

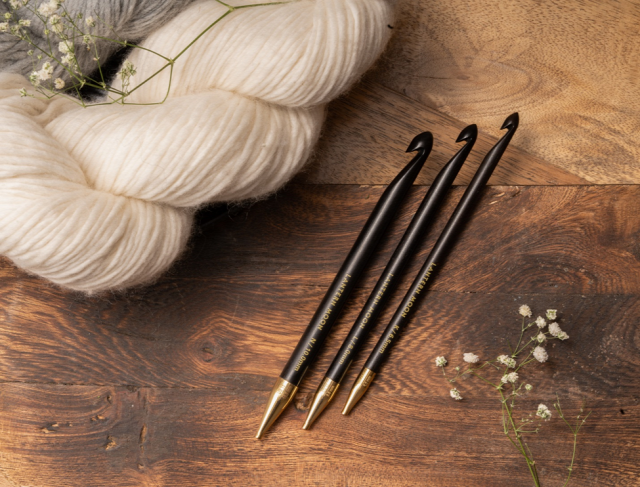
A great technique to give your pillows texture is with Tunisian crochet. You can make a denser, more complex fabric with interchangeable Tunisian crochet hooks from Lantern Moon, it has a liquid silk finish and is available in various cord lengths. Read our blog for 5 simple stitches for crochet beginners.

Here are some simple steps for you to follow:

  • Start with a foundation chain and work your way up by adding loops to your hook.
  • You can work with a Tunisian simple stitch across the row by inserting the hook into each vertical bar and pulling up a loop.
  • Create the traditional heart form by working in rows. Your cushion will seem more substantial and contemporary with Tunisian crochet.

  1. Join the Pieces

It's time to put your cushion together when you've completed crocheting the front and back pieces:

  • Join the two sections of hearts with the right sides facing out.
  • Next, join the edges with SC stitches, leaving a tiny space for stuffing.
  • Make sure the polyester fiberfill is uniformly spread across the cushion.
  • Use a finishing needle to weave the loose ends.

How to Customize Crocheted Heart Patterns?

One of the best things about crochet heart cushions is to customize them and give uniqueness to your project:

  • Create a striped pattern, switch between two colors, or use a gradient yarn for a dreamlike effect.
  • To adorn your pillows, sew buttons, beads, or crochet little flowers.
  • You can even add the initials of your loved ones using embroidery.

Key Points to Remember

  • The tension and appearance of your project are impacted if you use the incorrect hook size. For the best match, use a Radiance crochet hook set from Lantern Moon that includes different hook sizes.
  • For a polished appearance, weave in loose ends using a finishing needle.
  • Before beginning your heart cushion, practice it on a small swatch if you're new. Read our blog for more crochet gift ideas for Valentine's day.

Crocheted heart cushions are a means of sharing creativity and love. These pillows will warm hearts and make people smile, whether you're making them as gifts, Valentine's Day décor, or just a comfortable addition to your house. All you need is a wooden crochet hook and yarn to finish your masterpiece. There are countless options, and the outcome is always worthwhile.

Tovább

5 Adorable projects to try

With Easter quickly approaching, now is the ideal time to grab your knitting needles and make something festive! There is a project for everyone, whether you use circular knitting needles, double-pointed, or single-pointed ones. You'll be prepared to knit some gorgeous decorations, presents, and accessories to celebrate the season. There is something for every knitter among these projects, ranging from easy for beginners to a little more complex. Now let's get started on five adorable Easter knitting projects that are as much fun to create as they are to show off!

  1. Easter Bunny Egg

Adorable little bunnies are the essence of Easter, and these bunny eggs would look great on your table. Both beginners and experienced knitters will love these small cozies because they are quick and simple to make. For round shapes use double-pointed or fixed circular needles.

You can use pastel-colored soft DK weight yarn. For eyes, use tiny buttons or beads. Use a finishing needle to weave the loose ends.

How to Create?

  • First, join in the round by casting on stitches that fit around a regular egg.
  • Make the body of the bunny egg in a basic stockinette stitch.
  • Then, make tiny rabbit ears and sew them.
  • To add a whimsical touch, add eyes and a small pom-pom tail.

In addition to being useful, these cozies are a sweet way to decorate. They also make beautiful presents for friends and family.

  1. Knitted Bunny Basket

This project lets you show off your creativity. It’s the perfect way to store all your Easter goodies. It is an easy and simple oval shape that can be created using a circular knitting needle for comfort. Due to the thickness, you can use worsted-weight yarn, which also affects the looks and feel of the project. Your friends and family members will love the cuteness of the knitted bunny basket.

How to Create?

  • Knit the body of the basket in rounds and rows.
  • Add the long ears to the basket, depending on your preference, you can decide.
  • Knit the handle and attach it to the basket.
  • You can add embellishments like embroidered flowers or lace trim.
  1. Knitting Easter Cute Chickens

How would you celebrate Easter without cute chicks? It is fun to create and bring a smile to everyone's face. Both children and adults adore these little, fluffy chicks. They're quick to knit and quite adorable, making them ideal for home decor. You can use wooden knitting needles due to their warmness, and smooth surface that prevent your yarn from slipping.

How to Create?

  • Make a smaller sphere for the head and a larger, simpler one for the body.
  • Create a triangle beak and small wings.
  • Put the parts together, fill the body with cotton, then stitch it together.
  • To finish the chick's face, add eyes.

These adorable chicks look great alone or together with your Easter bunnies as decorations. To make them even fluffier, try experimenting with different yarn textures.

  1. Easter Themed Knitted Baby Hat

A baby hat with an Easter motif is a considerate and useful present if you're knitting for a young child. To make it more festive, pick a chick or bunny pattern. Use worsted-weight yarn in two or more colors.

How to Create?

  • Knit the body part in a stockinette stitch after casting stitches on the double-pointed or fixed circular knitting needles and join the rounds.
  • Add a chick’s crest or bunny ears on the top.
  • You can leave it plain or add an embroidered face on it.

It will be an absolutely stunning piece for a baby shower gift.

  1. Easter Themed knit Garland

Make a garland with knitted rabbits, eggs, and flowers to adorn your house. With this project, you can add a festive touch to any space while experimenting with various designs and colors.

You can knit several motifs with different yarn colors with circular knitting needles or DPNs and make these adorable patterns.

How to Create?

  • You can use multiple patterns to knit individual pieces, such as flowers, tiny bunnies, and egg shapes.
  • Ensure each piece is in proper shape, so, block it nicely.
  • Use ribbon or rope to fasten these shapes.
  • You can either place the garland on the door or wall.

This is the best way to utilize your leftover yarn and combine design to make unique pieces.

The knitting Easter project is a fun way to celebrate your creativity and can be customized according to your taste and style. Also, you can experiment with different stitches and make them unique. Each creation, whether using circular, wooden, or single-pointed needles, is a work of love that gives your festivities character and warmth. Learn more about it in our blog, knit and crochet your way into spring with delightful Easter décor. So, pick a project, get your yarn and needles from Lantern Moon, and let your imagination flow. Your Easter crafts will be treasured decorations for years to come.

Tovább

How to Crochet an Easy Tunisian Rib Stitch

Are you ready to learn a new crochet stitch? Let’s take one from Tunisian crochet. A beautiful mix of knitting and crochet, A technique that brings fun, versatility, and a great texture: grasp the rib stitch method using your favorite Tunisian crochet hooks. Are you excited? Great! Whether you are a newbie or an expert, it is good to know and become an expert in new techniques because it will ultimately add skill to your crafting. Let’s start exploring the Tunisian rib stitch pattern through this blog.

Why do you love Tunisian rib stitch? 

One of the reasons is that it creates a stretchy and well-textured fabric that’s excellent for hats, scarves, and sweaters. Most importantly, it looks similar to knitted rib stitches.

Materials you need for Tunisian rib stitch 

  • You can use interchangeable Tunisian crochet hooks; they handle the slippery yarn easily, are lightweight, and pick up the stitches quickly.
  • For yarn, ensure it matches the hook size of your Tunisian hook.
  • To cut the yarn, keep a pair of scissors.
  • Make sure you have crochet accessories like a finishing needle to weave the loose ends of fabric and a measuring tape to check the gauge and dimension.

Understanding terms related to Tunisian rib stitch 

As we are clear about the material, the next step is to familiarize you with the terms used while crocheting the patterns.

  • Tunisian simple stitch (TSS): In this, you insert your crochet hook under the vertical bar of the second stitch, yarn over it, and pull a loop. Keep your loop on the hook. Don’t slide it.
  • Tunisian knit stitch (TKS): Pull up a loop by inserting your hook between the front and back vertical bars of the next stitch, exiting the back of the work, and yarn over. Hold onto the loop with your hook.
  • You must know the foundation chain, standard return pass, forward, and return passes.

A step-by-step guide to crochet Tunisian rib stitch

Step 1 Foundation chain/row 

  • First, make a foundation chain of 10 stitches.
  • Next step; insert the hook into the second chain, yarn over, pull up a loop across the chain, and keep loops on the hook.
  • Then, work on the standard return pass by yarn over and pull through one loop first, again yarn over and pull through two loops, and repeat this process until you are left with one loop on the hook.

Step 2 Row 1 (Forward pass)

  • Now, in this, alternate TSS and TKS across the row, end with TSS in the last stitch before the final edge.

Step 3 Row 1 (Return pass) 

  • Afterwards, work on the standard return pass by yarning over and pulling through one loop first, yarn over, pull through two loops, and repeat the same process, until you leave one loop on the hook.
  • Continue your work on the row one sequence for the length of your project; ensure that you start with TSS and alternate with TKS, followed by a standard return pass. Great, you get a rib effect!

Step 4 Finishing

  • Once you are about to finish your project, it’s time to bind off. To complete this final step, follow a final row of the stitch pattern, but instead of leaving loops on the hook, you need to finish each stitch by pulling the yarn through both loops. This will create a clean and neat edge.

Great, you did a fabulous job!

Tips for a successful result

So, before you begin these crochet stitches

  • Use smooth yarn; these are the best for beginners so that you can see the stitches.
  • Make sure you have an even number of stitches to maintain a ribbed pattern.
  • Keep track of stitches using stitch markers.
  • Practice makes perfect, so keep practicing it until you are confident.

Congratulations to all the crafters, who have learned this awesome crochet Tunisian rib stitch. With this new technique, make fantastic projects like hats, sweaters, and shawls using premium crochet hooks.

Summary: Are you eager to learn how to crochet Tunisian rib stitch? If you want to create an amazing pattern using Tunisian Crochet hooks, you are at the right place. In this guide, we have mentioned the complete process in detail. So, grab your yarn and crochet hook.

Tovább

Crochet for Beginners: Tips and Projects to get started

Crochet word is derived from the French term 'croc', which means 'hook'. It is a simple and innovative process of creating a design and patterns using crochet hooks . You might be surprised that this was used in the 17th century for French lace-making. Some people take this as a hobby and a few consider it professionally. It's a versatile craft that relaxes your mind and improves focus. What are you waiting for? Get ready for the beautiful journey in the world of craft, explore the different patterns, and create exceptional projects. Don't worry, in this blog, you will learn all the tools and materials required to get started, understand crochet terminology, and project ideas you can crochet.

Tips to Get Started Crochet

Crocheting is a great hobby plus a stress buster, moreover, it also develops analytical skills and creativity.

Here are some tools and techniques required:

  1. Choosing the right type of yarn

The first step is choosing a yarn. Yarns are available in different materials, sizes (weights), and colors. Selecting the correct yarn will greatly impact your crochet project. If you are a beginner, we recommend trying yarn that is easy to work with.

As a beginner, opt for bright or light colors, so that you can identify the stitches easily. As a beginner, avoid black and dark colors. It is sometimes challenging to work with textured and thick yarn. Use acrylic or mixed cotton blended yarn. However, it's your personal preference. Hence, Work on the yarn that matches your skill.

  1. Choose the right Crochet hooks for your project

You don't need all the hooks in the beginning, just use one hook that matches your yarn weight. However, once you have a fair idea you can experiment with other crochet hook sizes.

We have listed some crochet hooks for your reference:

  • You can opt for wooden crochet hooks, a good option for beginners. It is less slippery than metal hooks and you will get a good grip.
  • Another crochet hook you can experiment with is an interchangeable Tunisian crochet ). These come in various ranges from small to large. This is a good option when you are unsure how much yarn is required in your project.
  • Single-ended crochet hooks (suits to all types of fabrics). This offers a smooth and snag-free crochet experience to all the crocheters.

Note: While choosing the crochet hook, you should always check the weight of the yarn.

  1. Crochet Accessories

Explore all kinds of useful accessories that are designed to help your projects. There are various ranges of crochet accessories such as scissors, tapestry needles, stitch markers, and measuring tape.

A glance at US and UK crochet terms

US

UK

Ch- Chain stitch

Ch-Chain Stitch

YO- Yarn Over

YOH- Yarn Over

SL ST- Slip Stitch

SL ST- Slip Stitch

SC- Single Crochet

DC- Double Crochet

DC- Double Crochet

TC- Treble Crochet

HDC- Half Double Crochet

HTC- Half Treble Crochet

TR- Treble Crochet

DTR - Double Treble Crochet

DTR - Double Treble Crochet

TRTR- Triple Treble Crochet

SK - Skip

MS- Miss or SK- Skip

 Best project ideas for beginners

You can do various projects by following the above tips. Here are some project ideas that you can start with:

  1. Scarf

This project is ideal for beginners. You can use simple or advanced techniques to create a beautiful scarf . Customize your design with different colors, stitches, and textures.

  1. Shawl

It is the easiest method to work on shawl and provides ample opportunity to practice and master all the fundamental techniques.

  1. Dishcloth

It is also a simple square shape. Useful to practice basic stitches. A good option for home decoration.

  1. Six

Getting hands-on experience with round shapes. You can enjoy making different crochet hats and beanies, which will keep you warm in winter for a long time. For beginners, choose a yarn with good elasticity, neither too fluffy nor too thick.

  1. Granny Square

Granny square One of the innovative techniques through which you can create shapes of square or hexagon. Then join them and make blankets, square pillows, fingerless gloves, and simple slippers.

Crocheting is a great way through which you can explore your creativity. For beginners, the key to success depends on the practice with the basic stitches and then moving to the advanced project. We have shared tips to help you start your journey with Lanter Moon crochet hooks .

Are you ready to explore new patterns in crochet?

So, start crocheting today and make a beautiful project. Are you interested in learning how to make a straight chain? Read here .

Tovább

Learn How to Crochet with 5 Basic Stitches

Crochet is a lovely yarn craft that produces fabric for sweaters, hats, scarves, blankets and many more. The craft has only five basic stitches while the rest are just combinations of them. If you are just starting with crochet, all you need to learn are the five basic stitches. In this blog, let’s take you through the crochet stitches.

Before you start, you need

  1. Crochet hook: While choosing the type of crochet hook you can either choose the single-ended crochet hooks or even the interchangeable Tunisian crochet hooks that come with the option of using a cord. Understanding crochet hook sizes is important for the craft as the general rule is bigger the hook size bigger the stitches and smaller the hook size, smaller the stitches. You’ll be needing this information when you plan your own projects as most crochet patterns cover the information.
  2. Yarn: As you are learning the basic stitches, 4 ply medium-weight yarn is recommended. With this yarn you can easily see the stitches you make. For practice you can take any yarn in your collection as long as it is comfortable for you.

Now here’s how to crochet basic stitches, crochet is based on five. We will be exploring them below.

  1. Chain stitch (ch)

Chain stitches are the foundation of a crochet pattern unless specified to start in any other way and is the equivalent of ‘casting on’ in knitting.

  1. Single crochet (sc)

Insert the crochet hook into the second chain. Wrap the yarn over and draw the yarn through the chain only. Wrap the yarn again and draw the yarn through both loops on the hook. You will have one single crochet stitch.

  1. Half Double Crochet (hdc)


To make a half double crochet stitch, yarn over and insert the crochet hook into the third chain. Pull up three yarn loops in the hook. Yarn over and pull yarn through loops on a hook.

  1. Double Crochet (dc)

To make a double crochet stitch, wrap the yarn over the hook. Insert the crochet hook into the third chain. Wrap the yarn over the hook, draw through the chain only and wrap the yarn again. Draw through all three loops on hook. Pull yarn through two loops. Pull the yarn over one loop and one double crochet stitch is made.

  1. Treble Crochet (tr)

The treble crochet stitch is made by wrapping the yarn over the hook twice. Insert the crochet hook into the fifth chain from the hook. Wrap the yarn over the hook, draw through the chain only and wrap the yarn again. Draw through the first two loops only and wrap the yarn again. Draw through the next two loops only and wrap the yarn again. Draw through the last two loops on hook and one treble crochet stitch is made.

Slip stitch (sl st)

The slip stitch is a basic but foundational technique that helps all through your crochet craftwork. Whether it’s completing a round, fastening off the yarn, joining two pieces of fabric together, or moving within a pattern, the slip stitch is a master stitch.

Once you have had enough practice, go for beginner projects such as blankets, scarves, afghans, etc. Soon enough you will have wonderful crochet creations on hand.

Till then, happy crocheting!

Tovább

How to Knit Seed Stitch  

Want to knit a textured stitch pattern making your knitted fabrics stand out? The seed stitch is a quick and easy pattern that balances knit and purl stitches and has a seed-like appearance. The versatile stitch pattern is made with a balanced number of knit and purl stitches on any of your regular knitting needles. It is easy enough that even beginners can learn the steps once they’ve mastered the knit and purl stitches. From small baby projects to large blankets, the stitch can be easily added to any project and it will enhance the beauty.

What is Seed Stitch? 

The Seed Stitch is a completely reversible pattern; both the right side and the wrong side are identical. Every row or round of your knitting consists of a pattern of alternating knit and purl stitches. The stitches look like seeds hence the name. Preferred by many knitters to make their projects look beautiful. Even for projects where other stitch patterns or techniques are used, seed stitch is favored as it easily lies flat, often used for the borders of blankets that tend to curl up. The stitch pattern is used in knitting projects such as dishcloths, blankets, scarves, hats and pretty much everything that can be made beautiful with textured stitches.

Knitting Needles: You can work the seed stitch pattern with any of your regular knitting needles as you can knit and purl with any of them. Single-pointed knitting needles are the best choice for beginners. To practice the pattern, you can go ahead. But, once you work on the project, the choice of needles basically depends on the project. If you are knitting in the round, explore a set of double-pointed needles (DPNs) or circular needles. If you are knitting flat (back and forth), single-pointed needles and circulars are fit for the task.

Yarn: For yarn, you can work with any but make sure that they allow the formation of seeds clearly on the knitted fabric.

So, let’s begin.

Step 1: Cast on an Even or Odd number of Knitting Needles 

Seed stitch patterns work for both even and odd number stitches. Make a slip knot on the knitting needle and count it as the first stitch. Many advanced knitters do not work with a slip knot but that is completely fine. A slip knot basically connects the yarn to the knitting needle.

Cast on stitches in any method you prefer. The number of stitches is mentioned in the pattern while for practice you can work with 15-20 stitches.

Step 2: Knitting the Seed Stitch 


The steps to work the seed stitch depends on whether you are knitting an even or odd number of stitches. You will be working with knit and purl stitches, but the instructions will differ.

Knitting abbreviations 

K- Knit

P - Purl

*to the end of the row

For an even number of stitches, follow the pattern:

Row 1: k1, p1*

Row 2: P1, k1*

Alternate row 1 and row 2 for the entire length of the project

For an odd number of stitches, the pattern is:

Row 1: k1, p1* and k1.

Row 2: k1, p1* and k1.

Repeat the pattern for the rest of the project.

To work the stitch pattern knitting in the round on circular needles or even double points (DPNs), the instructions are the same. You work the stitches to the end of the round, and then without turning your WIP, you continue with the next round. Just remember to follow the pattern for even stitches or odd stitches in the round. Make sure to place a stitch marker to mark the beginning of the round, so that you do not make mistakes.

Step 3: Bind off and weave in yarn ends 

Once you’ve are finished with the pattern, like all stitch patterns and projects, you need to bind off. Similar to cast-on techniques, there is a wide variety of methods to bind off stitches. The instructions to bind off stitches are determined by the stitch pattern. For knit stitches, you bind off knitwise and for purl stitches, you bind them purlwise. After you’ve finished snip off the yarn but make sure to leave a 6-inch tail.

Weave in the yarn ends with a finishing needle or a repair hook.

With this tutorial, get ready to take up the seed stitch pattern for your projects. You can start small with a dishcloth or the edges of a blanket and move on to other projects. If you are following a pattern make sure that you are following the US one as the seed stitch in UK knitting patterns are different. The moss stitch pattern is similar to the seed stitch and can be confusing. Both stitch patterns follow knit 1, purl 1 in a row alternating with purl 1, knit 1; while the moss stitch calls to knit 1, purl 1 for two rows and then to purl 1, knit 1 for the next two rows.

For all your knitting needs, explore the Lantern Moon collection. The premium knitting needles are made from ebony wood. Handcrafted by skilled artisans, the needles, crochet hooks, accessories and even sets are of artistic value serving knitters for generations.

Tovább

How to Tunisian Crochet in the Round

Tunisian crochet, sometimes called the "crossroads" of knitting and crochet, has an allure all its own. Surprisingly, this technique is more versatile than it looks, as most people associate it with flat projects like blankets and scarves. Tunisian crochet hooks, the correct equipment, and a little skill can help you turn yarn into a variety of circular wonders, such as fashionable headwear, useful bags, and adorable amigurumi dolls. This thorough guide will help you become an expert at this fascinating craft by providing step-by-step instructions and professional advice.

What You Will Require

Let's make sure you have all the required materials before we begin the technique:

  • Tunisian Hook for Crochet: An extended crochet hook with a stopper on one end, similar to a regular crochet hook, is required for Tunisian crocheting. Choose a Tunisian crochet hook size based on the weight of your yarn, as they come in different sizes.
  • Yarn: Choose your preferred yarn in your choice of color. Confirm that it fits the yarn weight recommended by the Tunisian crochet hook.
  • Stitch Marker: If you are working in a continuous spiral, a stitch marker will be convenient for recording your rounds.
  • Scissors: To cut the yarn, you'll need scissors.
  • Yarn Needle: Use a yarn needle to weave in the ends.

With everything at your disposal, let's proceed to the instructions for Tunisian crochet in the Round.

Step 1: Base Chain

Make a foundation chain first. The project and pattern you choose will determine how many chains you need.

Step 2: First Round

  • Hook into the second chain from the hook, and pull up a loop by yarn over. Keep your hook in this loop.
  • To leave them all on the hook, keep putting your hook into each chain across the foundation chain, yarn over, and pull up a loop.
  • You will have several loops on your hook after working through every chain.

Step 3: Return Pass

The return pass is essential in Tunisian crochet, whether working flat or in the Round.

  • First chain
  • Pull through two loops on the hook and yank over
  • Until there is just one loop left on your hook, repeat step 2 as necessary. It finishes the Tunisian simple stitch (Tss) in one row

Step 4: Second Round and Beyond

Work Tunisian simple stitches (Tss) for the second and all subsequent rounds. As follows:

  • Like in the flat Tunisian crochet, insert your hook under the front vertical bar of the subsequent stitch, yarn over, and pull up a loop.
  • In every stitch around the circle, repeat step 1.
  • Proceed with the return pass as outlined in step three.

Working in Continuous Spiral

There are two ways to join rounds: the continuous spiral and slip stitch methods. Now, let's talk about the continuous spiral approach.

  • To join rounds, do not slip stitch after finishing the return pass. Instead, work your Tss by inserting your hook into the first stitch of the new Round.
  • Work your rounds in a spiral pattern, using a stitch marker to indicate the beginning stitch of each round.

The continuous spiral method produces a seamless, spiraling fabric without a visible seam. It is perfect for projects that want a smooth, continuous surface, like hats and amigurumi.

Tips and Tricks

  • Count your stitches: To keep your project symmetrical and circular, maintain an even stitch count in each round.
  • Use stitch marker: Place a stitch marker in the first stitch of each round to keep track of your progress.
  • Color changes: If your project calls for color changes, make them on the last yarn-over of the stitch before the color change.
  • Play around with various stitches: Although this tutorial focuses on Tunisian simple stitch, you can experiment with other Tunisian crochet stitches to create different textures, such as Tunisian knit stitch (Tks) or Tunisian purl stitch (Tps).
  • Patience and practice are key: learning Tunisian crochet in the round may take some time, especially if it's your first time. Your greatest allies will be patience and practice.

You can create many creative projects beyond standard flat designs, from making unique amigurumi dolls to hats, with just a little practice and the right supplies. A firm grasp of the fundamental Tunisian stitches is also helpful. Try it and explore your new creativity of creating Tunisian crochet in the round.

Tovább

Beginners Guide to Knit a Scarf

Are you looking for beginner knitting projects? A scarf is easy to start with. An all-season-favorite project, you can start with your favorite knitting needles and yarn. You can easily work on a scarf if you’ve learned to knit and purl (or even if you have not). It is simply constructed in back-and-forth knitting with any stitch pattern. You can work in traditional rectangles or have fun with asymmetrical designs.

So, let’s get started. But first, gather your supplies.  

Knitting needles- Any straight needles or circulars suit the task as you knit back and forth. Single-pointed knitting needles are beginner-friendly. You can choose any length as long as they fit the width of the scarf as you go lengthwise. Just make sure to select the size matching the yarn weight. Circular knitting needles have an ergonomic design that allows you to divide the weight of the project and not strain your hands and wrists. They are perfect for back-and-forth knitting as well as knitting in the round. Double-pointed needles are usually only required if you think of an i-cord or any interesting design knitted-in-the-round.

Knitting accessories- As beginners in knitting, you will need assistance. So, make sure to have essential knitting accessories. A finishing needle, repair hook, stitch markers, sharp scissors, and measuring tape are must-haves.

Yarn—Choose beginner-friendly yarns such as wool in DK weight or a blend of wool-polyamide in DK or worsted weight. If you have yarn scraps, you can include them in the project. Also, explore yarns in colors according to the season. Bright and bold shades, pastels, neons, and variegated yarns are all-time favorites.

Stitch patterns - Choose stitch patterns according to requirements. Any time you work on knitting a scarf, you’ll start with a cast-on and end with a bind-off. The body can be knit with different patterns; all stitches are basically done with knit and purl stitches. A winter scarf will do well with a dense stitch pattern. Garter, seed, moss, and cables are perfect dense stitch patterns. Lace and open weaves are delightful summer creations.

Embellishments: You can add to the visual interest of your knitted project with tassels, fringes, pom poms, and beads.

Garter Stitch Scarf  

The basic stitch pattern creates a solid fabric that works for most scarfs, especially if you want a dense and warm knitted fabric. All you have to do is knit every stitch in every row. Explore our guide on how to knit the garter stitch. Even for summer, you can make the project in lightweight yarn in vibrant colors.

You can also try out a modified garter pattern. Condo knitting, a trend from the 1970s, uses a garter stitch pattern with two knitting needle sizes. The effect is an open weave that looks beautiful for a summer-inspired scarf.

Stocking Stitch (Stockinette) Scarf  

The stocking stitch pattern, known as Stockinette, is a basic pattern that lends itself beautifully to many knitting projects. Though it has a curling nature, it can work well with chunky wool, an edge of textured stitches, or the humble garter. The pattern works by alternating one row of knit stitches with another row of purl stitches.

Similar to Stockinette, reverse stocking stitch is also a good option. Instead of alternative rows of knit and purl, work on alternate rows of purl and knit stitches. The knitted fabric still curls, but the stitch pattern looks different from a regular Stockinette.

Multi-colored scarf  

Knitting with multiple colors is one of the easiest ways to dress up your knitted scarf. Choose two or three colors that complement each other. You can knit stripes or make color changes after 3-5 rows for bold lines.

Colorwork Knitted Scarf  

If you are a fan of colors, colorwork knitting is a beautiful world to explore. Stranded colorwork allows the introduction of motifs and designs. You can explore double knitting or intarsia or just add colors with duplicate stitches with a finishing needle.

Lace Knit Scarf 

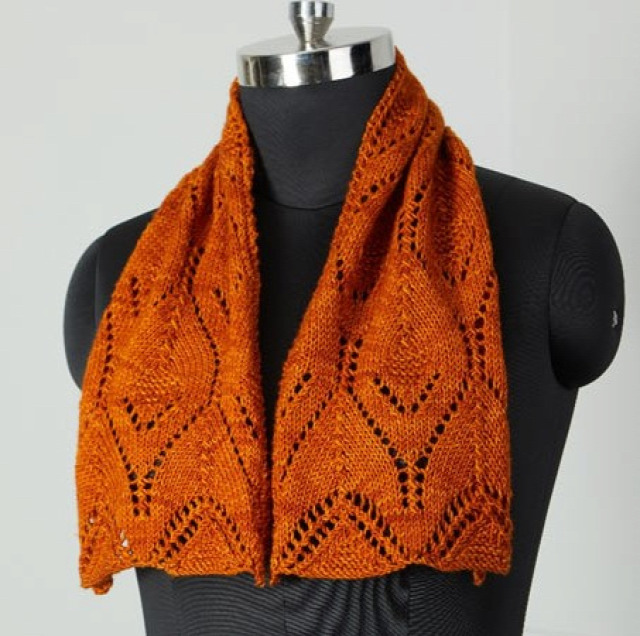
A lace scarf is a beautiful addition to any wardrobe. Choose knitting needles bigger than those mentioned on the yarn label or pattern. With lace patterns, create motifs of leaves, flowers, and more. Interchangeable circular needles are perfect for the task as they assist with smooth knitting and have a lifeline hole that works for the knitting pattern.

Seed Stitch Scarf 

The Seed Stitch is a reversible pattern that is the same on both the front and the backside. It comprises an alternating series of Knit and Purl Stitches, which form small bumps that appear like seeds.  

Ribbed Scarf  

The perfect warm scarf is knit with many textures. Ribbed stitches are simple yet the right amount of elastic and warm. Explore the interesting stitch patterns from simple 1X1 ribs to Fishermen’s Rib.

Cable Knit Scarf  

The cables are beautiful. Although they look complicated, they work with basic knit and purl stitches. A scarf is the perfect project for beginners to try out cables. Make sure to have cables needles. Refer to our guide on cable knitting patterns.

Get ready for scarf knitting! In addition to the above, you can make interesting scarfs with any number of stitch patterns. Enjoy smooth knitting with the Lantern Moon collection. Explore single-pointed needles or circulars (fixed and interchangeable) and even knitting needle sets for all your knitting needs. Handcrafted from ebony wood, each of the premium knitting needles boast of a silk-like finish that works with all kinds of yarn and projects.

Tovább

Tunisian Crochet Lessons: Basic Stitches to Try

Tunisian crochet, also known as Afghan crochet is a beautiful mix of knitting and crocheting. The craft works with an interchangeable Tunisian crochet hook but keeps the loop of stitches on the working hook just like knitting. Alike both crafts of knitting and crochet, this unique subset of crochet works on basic stitches. The stitch names are also the same as knitting and crocheting, Tunisian Knit Stitch, Tunisian Purl Stitch, Tunisian Double crochet, etc. Along with similarities, there are differences, too. As compared to traditional crochet, the fabric is highly textured. You get reversible fabric that has a similar tendency to knitting stockinette’s curling nature. Also, compared to knit and crocheted fabrics, Tunisian is much denser and warmer, ideal for winter projects. So, to learn the strings of the craft you start with mastering the basics.

How to Get Started with Tunisian Crochet

The right crochet hook is the first step to get started with Tunisian crochet. Refer to our beginner's guide to selecting a Tunisian crochet hook. You will need a hook that makes loops with a length similar to a knitting needle as you put the loops of stitches on the hook. It is essential that the crochet hook be light in your hands, smooth to work with and prevent snags. Lantern Moon’s ebony wood interchangeable Tunisian crochet hook is all that and more. The liquid-silk finish makes stitching a dream come true. Plus, you get standard sizes and cord lengths according to your projects. If you are keen on exploring the craft, the Bequest Set of interchangeable Tunisian crochet hooks has multiple sizes and accessories packed in a handy case of khadi-silk.

For yarn, choose according to the hook size. For practice, choose from your yarn stash. For projects if you are following a pattern, you will have all relevant information.

Fundamental Tunisian Crochet Stitches

Let's explore the three fundamental Tunisian crochet stitches that form the foundation for countless projects. With time, expand your repertoire but for beginner projects, the knowledge of these is sufficient. It is important to understand that Tunisian crochet stitches are worked over two rows. First, you have a foundation- the forward pass, where you make loops on your hook. Second, in the return pass you work the loops on your hook and create the fabric. But, like traditional crochet, you start with a chain with additional stitches for the turning chain. All stitches follow the 2-row step.

Tunisian Simple Stitch (TSS)

The foundation of Tunisian crochet, Tunisian Simple Stitch is easy to work even for beginners. The versatile stitch pattern works for many projects, such as a dishcloth, coaster, blankets, etc.

Steps to work TSS

Make a chain of 20+1 stitches.

Work the Forward Pass

1st Step- Insert your Tunisian crochet hook through the vertical bar stitch of the first loop.

2nd Step -Yarn over and pull up a loop, keeping the loop on your hook. Continue this process for each loop on your hook, working from right to left.

Work the Return Pass

3rd Step - Yarn over and pull through one loop on your hook.

4th Step- Yarn over and pull through two loops at a time until you reach the end of the row.

Tunisian Knit Stitch (TKS)

The Tunisian Knit Stitch (Tks) is a beginner friendly stitch pattern. Resembling its knitting counterpart, stockinette stitch the fabric made also shares its beautiful curl. The tenddnecy to curl works beautifully for some projects while it can be balanced with blocking or an additional row of TSS.

Steps to work TKS

Make a chain of 20+1 stitches for practice or as mentioned in a pattern.

Work the Forward Pass

1st Step - Insert the hook between the front vertical bar to the back.

2nd Step - Yarn over, pull up a loop, leave the loop on the hook, and continue across the row.

Work the Return Pass

The return pass for Tks is the same as for the Tunisian Simple Stitch (TSS).

3rd Step - Yarn over and pull through one loop on your hook.

4th Step- Yarn over and pull through two loops at a time until you reach the end of the row.

Tunisian Purl Stitch (TPS)

A little challenging, the Tunisian Purl Stitch also takes inspiration from knitting. Resembling the knitted Garter stitch, this Tunisian crochet stitch works for a wide range of projects. It is beautifully textured and reversible, perfect for many designs.

Steps to work TKS

Make a chain of 20+1 stitches for practice or as mentioned in a pattern.

Work the Forward Pass

1st Step – Make sure that the yarn should be placed in front of your work. Skip the first vertical bar and insert the Tunisian hook right-to-left under the next vertical bar.

2nd Step- Bring the yarn behind your piece of work. Yarn over, and pull up a loop in each stitch.

Work the Return Pass

3rd Step - Yarn over and pull through two loops.

4th Step - Repeat the 3rd step till the end of the row.

With these three basic stitch patterns get ready to Tunisian crochet.

Tovább

Tested Tips to Knit with Double Pointed Needles like a Pro

Are you overwhelmed while working with double-pointed needles? There’s no reason to stay away from DPNs. They are handy whenever you need to knit small circumferences. Think of socks, baby hats, necklines, and sleeves. DPNs have been in use for centuries and, to date, are preferred to knit things in the round. The five needles and ten points may seem challenging to handle. However, working with DPNs is believed to be a rite of passage for knitters to become masters truly. Whether you’re working for the first or 100th time, there are chances of mistakes, but the key is to correct them and have fun with your craft. If you are a beginner uneasy knitting with double-pointed needles, we’ll walk you through useful tips to become a pro in this blog.

Take a look at these tips

1. Cast on stitches on one needle tip and then divide them evenly

When you knit with double-pointed needles, you use three or four needles to make a circumference while knitting with the extra one. Ensure to cast stitches on one needle tip and divide them evenly, which will help you maintain the tension. Moving the slip knot also helps to move the stitches and maintain the tension. It is also helpful to move the stitches on the needles after a few rounds to balance the tension throughout the project.

Say, for example, you have to cast 30 stitches. Use any of your preferred methods to make stitches. Count the slip knot as the first cast-on stitch unless the pattern mentions otherwise.  If your pattern asks you to use three DPNs, slip 10 stitches on each needle. But if you need to work with four needles, then slip 7, 8, 7, and 8. Ensure that if you cannot divide the stitches evenly, you try to divide them equally as possible.

2. Work with 3 Needles 

While working with double-pointed needles, fewer needles in the round mean less chance of mistakes. If your pattern mentions 4 DPNs for the circumference, yet the stitch count is less, you can work with three needles but make sure to have the right length. Say, for example, you have 40 stitches and have been instructed to work with four needles, stick to 3, and you can still work the round smoothly. With options of 6-inch and 8-inch lengths, choose the right set of DPNs for your project accordingly. While 6-inch needles are ideal for socks, a sweater will require 8-inch lengths to accommodate the circumference.

3. Neatly join the round

Joining the round neatly is essential whether you work with DPNs or circulars. It is more significant to use double points as you may have to deal with ladders and gaps. There are many ways to join the stitches. An invisible join is a knitters’ favorite. To make an invisible join, you start by casting an extra stitch, and instead of knitting the stitch, slip it over. When working with DPNs, explore the various methods to join the round and understand what works for you. With time and practice, you’ll master the techniques.

4. Avoid laddering by maintaining tension

Ladders are a common problem that knitters face while working with double points.  Where two knitting needles join, stitches stretch or far apart, looking like the aftermath of a dropped stitch. Now a trick to solve this problem is to maintain constant tension but also to tighten up the second stitch on every DPN or the last stitch of the round.

5. Add Stitch Markers and Point Protectors

Knitting accessories are essential when you are working with double-pointed needles. Stitch markers and point protectors both are useful. Stitch markers are used for the purpose of marking and reference in a project. To identify the start of the round when working with DPNs, you’ll need stitch markers even though the yarn tail is there to remind. But instead of placing one at the last stitch of the round where it may slide off the needle, place it on the second last stitch. Similarly, needle protectors are useful, especially when you keep the project down for the day. The needle tips are covered, making it difficult for stitches to slide off by accident.

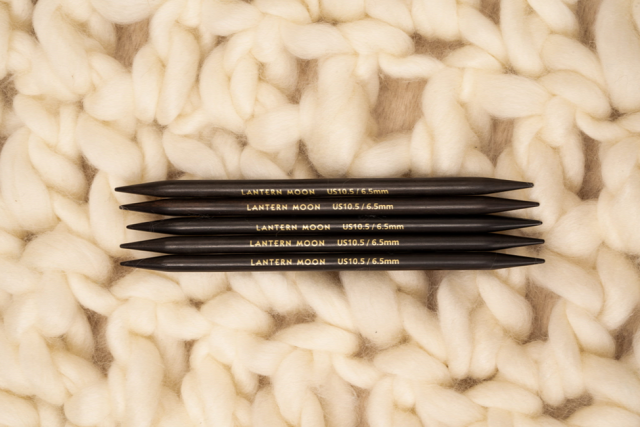
With these handy tricks, you will soon enjoy knitting with DPNs and reach for them for most of your circular projects. To enjoy working with double-pointed needles, the Lantern Moon collection offers smooth ebony wood knitting needles. Wooden knitting needles are preferred over others as the material ensures a balanced flow of yarn while stitch making. The needles' luxury silk finish and precision tips make for an enjoyable knitting session every time you pick them up.


Tovább
«
12

lanternmoon

blogavatar

Phasellus lacinia porta ante, a mollis risus et. ac varius odio. Nunc at est massa. Integer nis gravida libero dui, eget cursus erat iaculis ut. Proin a nisi bibendum, bibendum purus id, ultrices nisi.

Utolsó kommentek